AI Support Specialist With Groq - Part II

Overview #
What will you learn in this guide? #
NOTE: This guide is part II of a two-part guide focused on building a customer service representative on an Airtable base. We recommend you
start with Part I if you have not yet completed it. In part I, we walked through:
- Setting up your Groq API Key
- Setting up the Airtable Base and Access token
- Creating initial functions
- Calling functions with the Large Language Model (LLM)
- Adding a front end to your application
- Deploying the application
Originally, we just called one function. In this guide, we will use that same project, but we will walk through calling multiple functions.
Getting started #
To get started, fork the part 2 template on Replit by clicking “Use template.”
Setting up more complex function calling #
Calling multiple functions can be broken down into two different types:
- Parallel - Calling two functions that are independent of each other
- Multiple - Calling two functions that are dependent on one another
In the former, we can call the functions at the same time. For the latter, we need to call them in the proper sequence, so they execute properly.
Parallel tool use #
To call multiple functions, we need to iterate over multiple tool calls from the LLM. We can do that with a “for” loop, which looks like this (do not paste anywhere yet):
The code looks says:
- The model responds with a list of tool_calls
- For each tool_call in tool_calls, label the following variables and append in the messages
Paste this full code block from src/03_parallel_tool_use.py at the bottom of main.py. This should come after the block of code that lists the tools (begins with tools =).
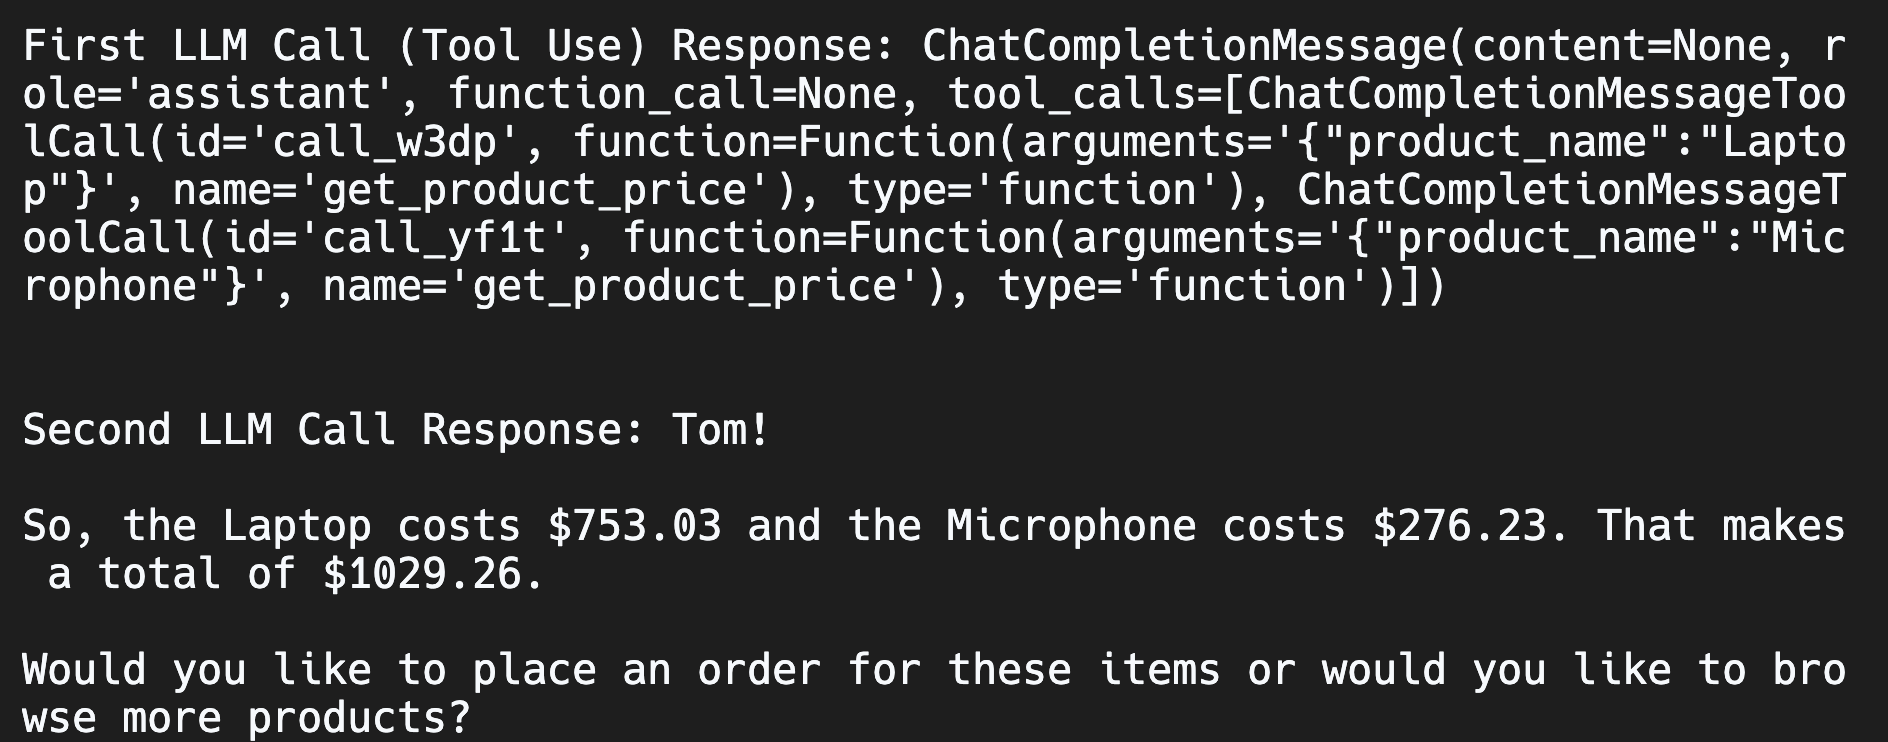
Click run, and you should see something like this in the console:

This output shows we made two calls to the LLM. The first one gets the tools to use. The second call then uses those functions (with the code we have above) and then returns a natural language response. In this case, it correctly called the function get_product_price twice. Once for the microphone and once for the laptop.
Multiple tool use #
There may be instances where you want to call functions that depend on one another. For example, if we want to use create_order, we need to provide a product ID. Instead of asking the customer for the product ID, we can use get_product_id to find it, and then we use that to create_order.
To do this, we'll add a WHILE loop to continuously send LLM requests with our updated message sequence until it has enough information to no longer need to call any more tools. (Note that this solution is generalizable to both simple and parallel tool calling as well).
Remove the section you pasted in main.py above, and replace with the code located in src/04_multiple_tool_use:
If you click “Run”, you should see confirmation in the console:

If you check Airtable, you will see that the order has been created in the database:

Add a frontend and deploy your application #
Now that you have built a functioning chatbot, we should add a frontend and share it. The frontend will give a chat interface that users can interact with. Deploying it will create a permanent replit.app or custom domain to share.
Note: replit.dev urls are for testing, but they only stay up for a short period of time. To keep the project active and shareable, you need to deploy it.
In the original template you forked, we included a file called 04_final_frontend.py within the src folder. The code in this file will look mostly the same, but there are a few differences:
- import streamlit as st - We are importing a Python package called Streamlit. Streamlit makes it very easy to create a frontend for Python applications.
- st. - You will see many lines of code with st. now included like the title("Simple Function Calling"), markdown(, text.input(, and more. These lines now call on Streamlit for a frontend.
If you would like to learn more, I recommend checking out Streamlit documentation or the Replit Streamlit quickstart guide.
To use this code, we just need to configure the Repl to run the 04_final_frontend.py file and use Streamlit. To do this, find the .replit file under "Config files." Replace all of the code in the .replit file with:
Then click "Run". You will see the application appear in the "Webview."
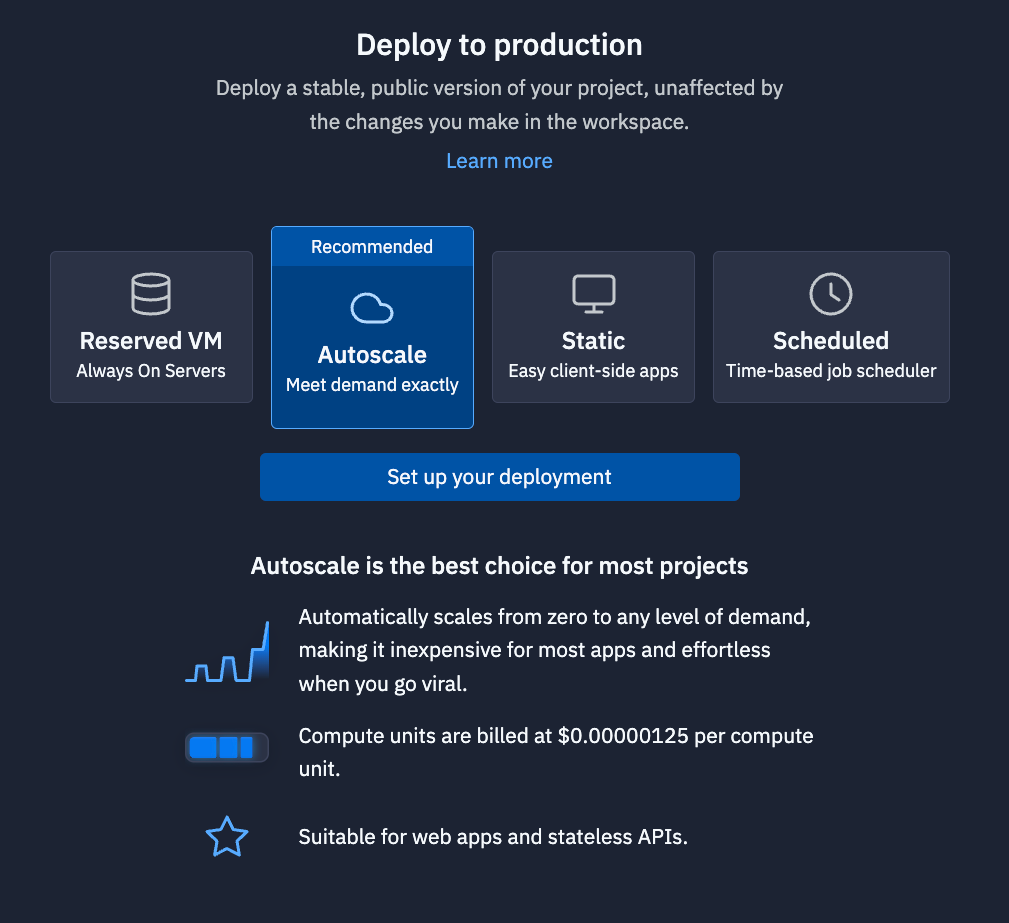
The final step is to deploy. In the top-right corner of the Workspace, you will see a button called "Deploy." Click the Deploy button.

Click "Setup your deployment", and follow the steps in the pane. Once the project is deployed, you will have replit.app URL that you can share with people. (Note: Deploying an application requires the Replit Core plan. Learn more here.).
LangChain integration #
If you want to us Groq with LangChain, 06_langchain_integration.py includes this chatbot using LangChain instead. It cleans up the code. You can run it by pasting in main.py.
What's next #
For your next project, checkout the Groq cookbooks or our other guides.

